Put employees in control of their time by setting up Schedules and Check in/out on Avanti Go. As an administrator, you can set up Avanti Go so your employees can view schedules and use their mobile devices to check in and out for their workday and breaks.
Schedules and Check in/out are only available to clients with Time and Attendance.
Schedule Overview
Employees can see when they’re working next on Avanti Go. As an administrator, you can set this up to only display certain shifts. You can also tailor the information displayed on the schedule.

You can set any Time Entry Template to display on Avanti Go. Only the first schedule template the employee can access will be available. Employees cannot modify their schedules on Avanti Go; they can only view upcoming schedules. Check out Set Up Schedules for more information.
On Avanti Go, employees can request a coworker to work a shift and request to work additional shifts if they’re using Schedule Pooling. Not using Schedule Pooling yet? Go to Schedule Pooling Setup Guide to get started.
Check In/Out Overview
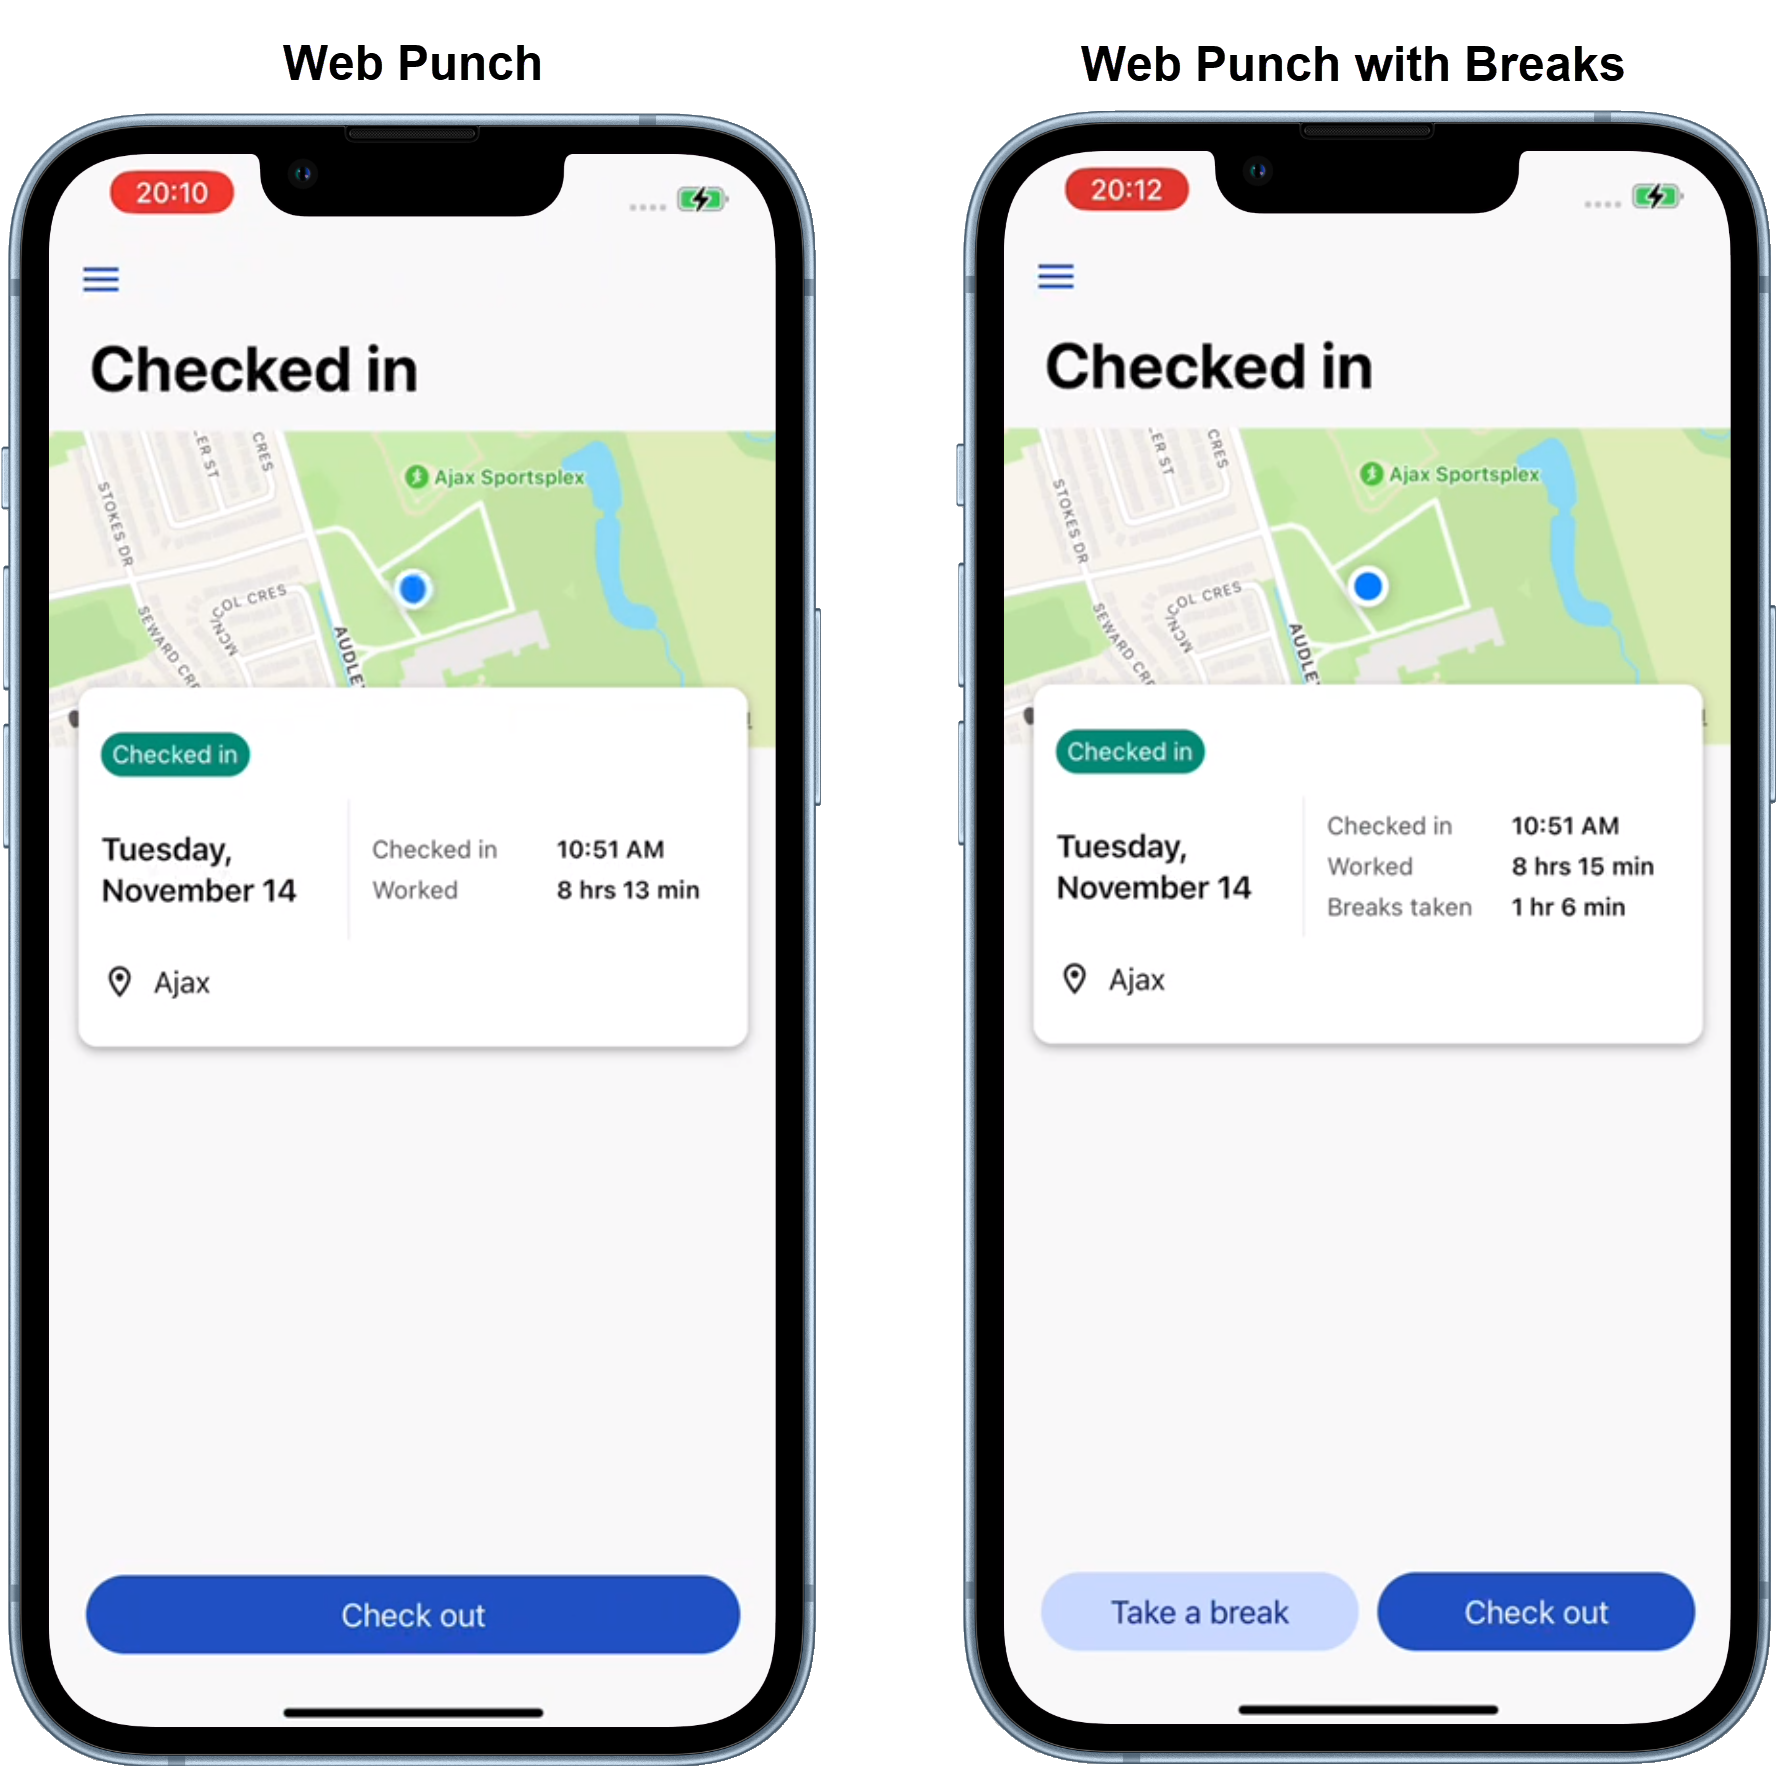
Enable your employees to check In and Out for work anywhere they have an internet connection using Avanti Go. Employees can check in when they start work and check out when they leave work using Check in/out. If you would also like them to be able to check in and out for breaks, they can use Check in/out (with breaks).

Avanti Go provides the ability to include or require access to employees’ locations when they check in/out on their mobile devices. Employees can also use GPS on their devices for region monitoring, which will let employees know if they missed checking in or out when they enter or leave the location of their last check in.

For more information on setting up location tracking when employees check in/out on Avanti Go, skip to Set Up Check in/out and Check in/out (with breaks).
Set Up Schedules
You can display any Time Entry Template for schedules on Avanti Go. If you’ve got multiple Views set up for schedules, you’ll need to determine which View you’d like to use.
Additional Information
Avanti Go displays the first template they have access to. If different employees should see different information, you can create multiple templates on the same View and restrict the employee’s access to the template.
This section guides you through updating your current Templates to display on Avanti Go:
How to Set Up the Card Display
Cards display on Avanti Go to summarize the employee’s upcoming workday. Cards always display the schedule’s:
Date
Times or Units
Status
You can set up Cards to include additional pertinent information from the schedule. Once this setup is complete, Cards will appear similar to the following:

If you do not want additional information displayed on the Card, please skip to the Add Schedules To Mobile Menu section.
Step 1: Open a View in Time Entry Templates.
By default, this can be found in Web Services >> Installation & Maintenance.

Step 2: Select the first Template with Schedules on the Templates tab, then click Modify.

Step 3: Select what you want to display for the Description Line. If none of the options suit your needs, select Custom.
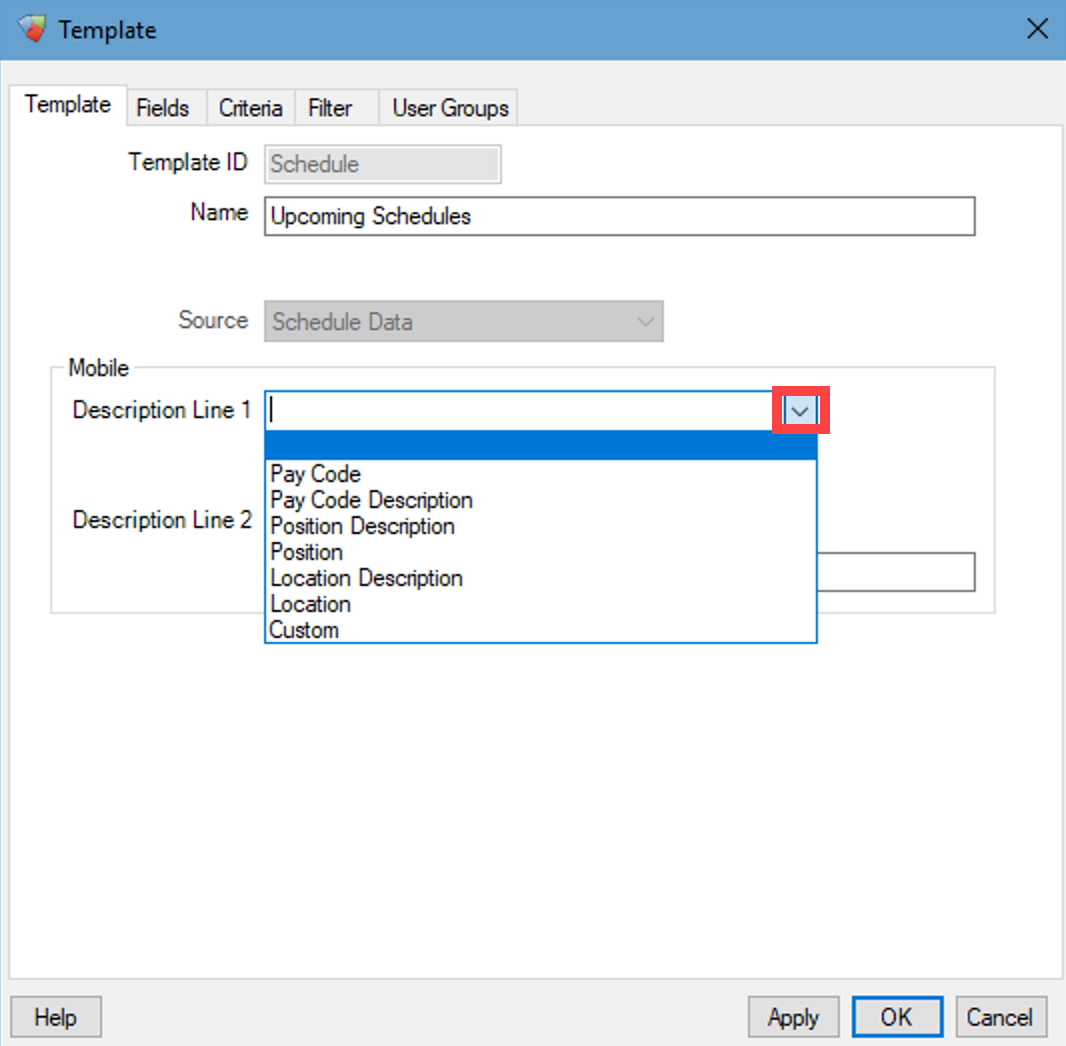
Step 4: If you didn’t select Custom in Step 3, skip to Step 5.
Step 4A: You can include the following information from the schedule:
Description Line Options | |
Values | Description |
Position | The ID of the schedule’s Position. |
PositionDesc | The Description of the schedule’s Position. |
PayCode | The ID of the schedule’s Pay Code. |
PayCodeDesc | The Description of the schedule’s Pay Code. |
ShiftId | The ID of the schedule’s Shift. |
Location | The ID of the schedule’s Location. |
LocationDesc | The Description of the schedule’s Location. |
TaskId | The ID of the schedule’s Task. |
TaskIdDesc | The Description of the schedule’s Task. |
Additional Information
The information will only display if it is on the schedule.
Step 4B: Determine what text will display in addition to the information from the schedule.
Additional Information
This text will display on the Card regardless of whether there is any information on the schedule.
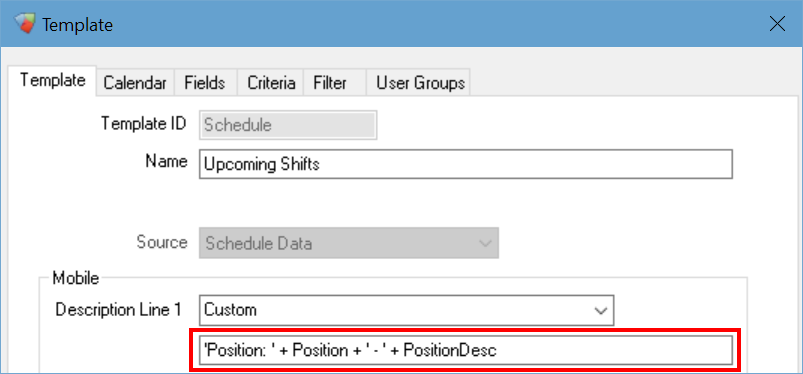
Step 4C: Combine the schedule information with the additional text.
Enter the desired values from ‘Values’ in the ‘Description Line Options’ above.
To display additional text - such as spaces, hyphens, etc. - add the character to the setting within single quotes.
A + must separate each section of the text and each value.

Step 4D: Add this into the line beneath Custom.
Step 5: Repeat Step 3 and 4 if you want to include additional information on another line. Add the results to Description Line 2.
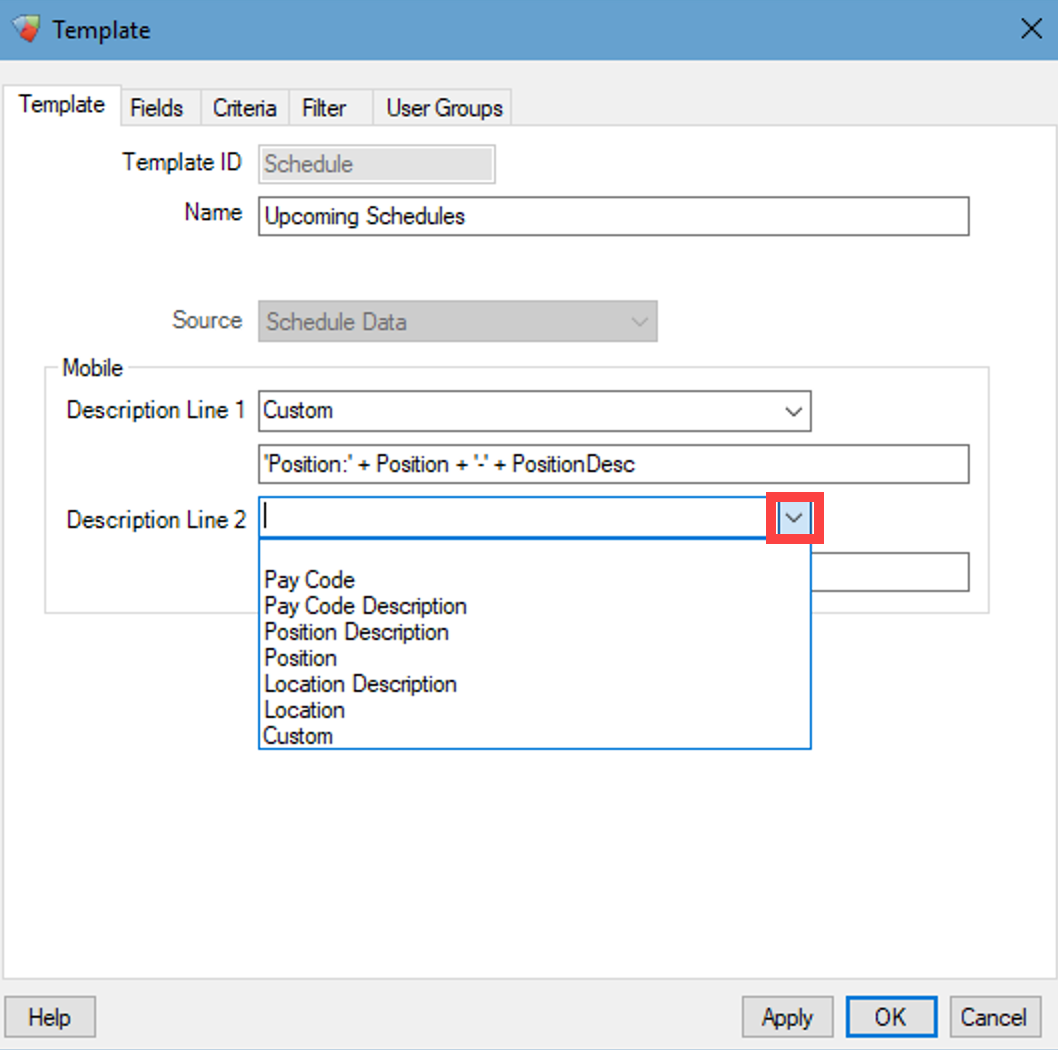
Step 6: Select OK.

Step 7: Repeat Steps 2 through 6 for each schedule template for the View.
Congratulations! You’re all done setting up the Schedule Card Display.
How to Add Schedules To Mobile Menu
The following section will guide you through adding Schedules to the Mobile Menu.
Step 1: Select Display Update Menu in Mobile Menu.
By default, this can be found in Web Menu >> Installation & Maintenance.
Additional Information
Skip to Step 4 if you already have Schedules on the Mobile Menu.

Additional Information
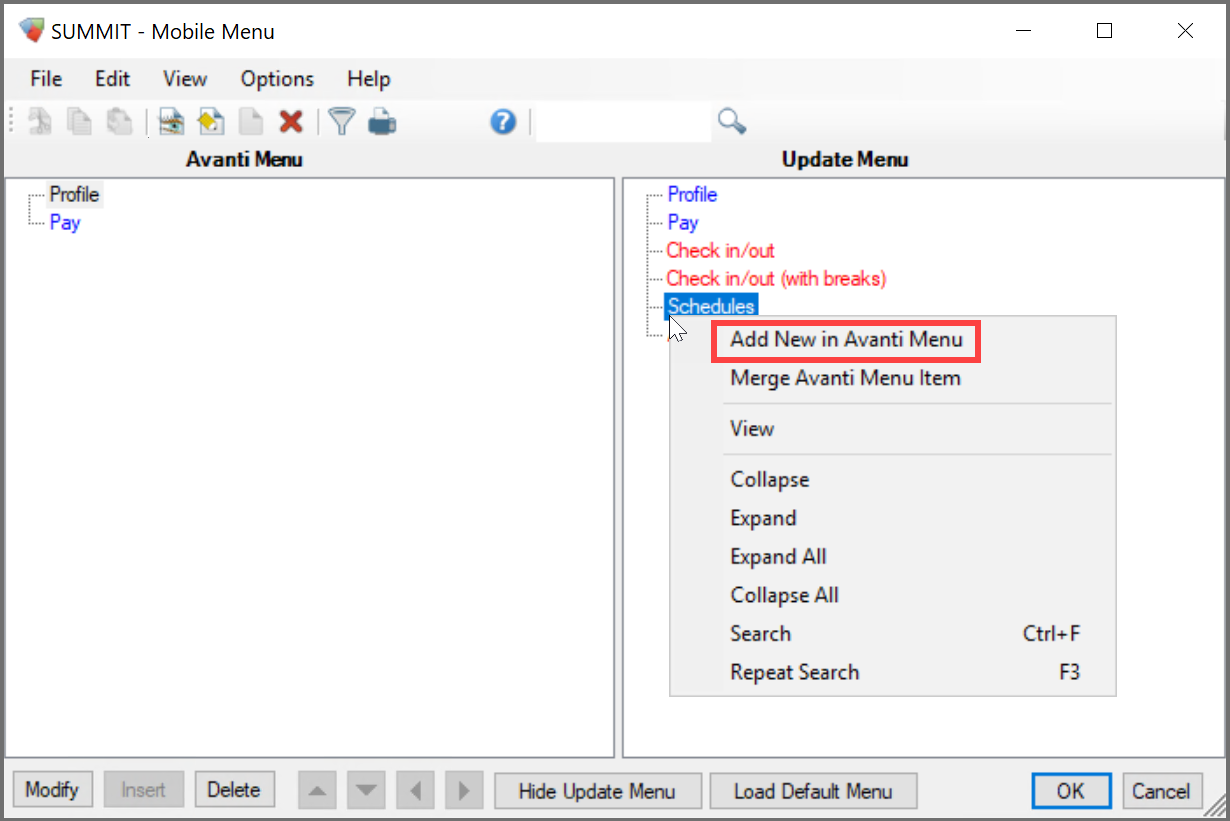
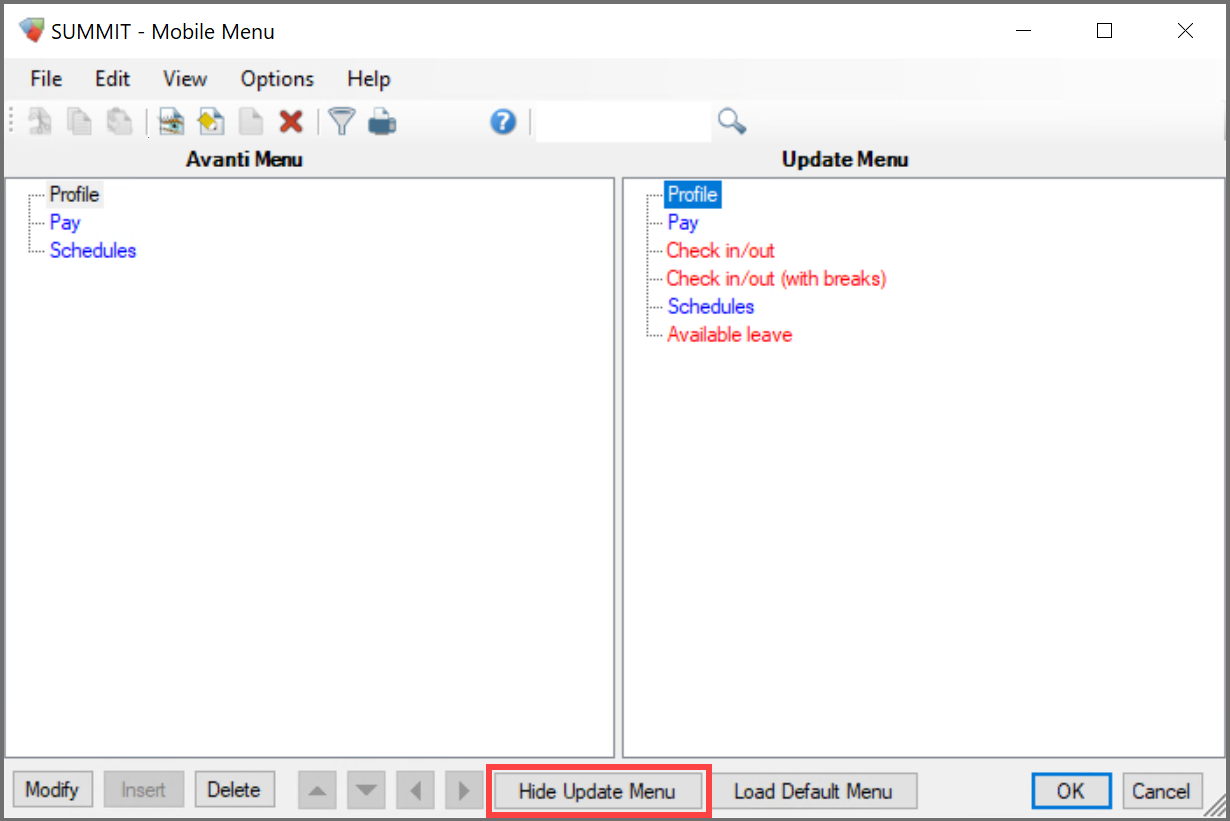
Once Display Update Menu is selected, an additional column, Update Menu, will display. The Update Menu shows all the available menu items.
Step 2: Right-click on Schedules and select Add New in Avanti Menu.
Additional Information
Schedules displays in red on the Update Menu if it’s not already on the menu. If it’s already on the menu, skip to Step 4.
Step 3: Select Hide Update Menu.
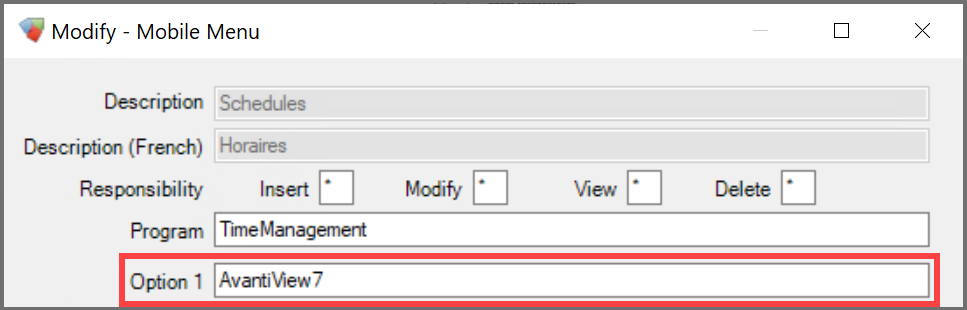
Step 4: Right-click on Schedules and select Modify.

Step 5: Update Option 1 to match the View ID in Time Entry Templates.
Step 6: If any of your employees don’t have access to a Template on the View, you must restrict access to the menu based on User Groups.
If all employees should have access to the View, skip to Step 10.
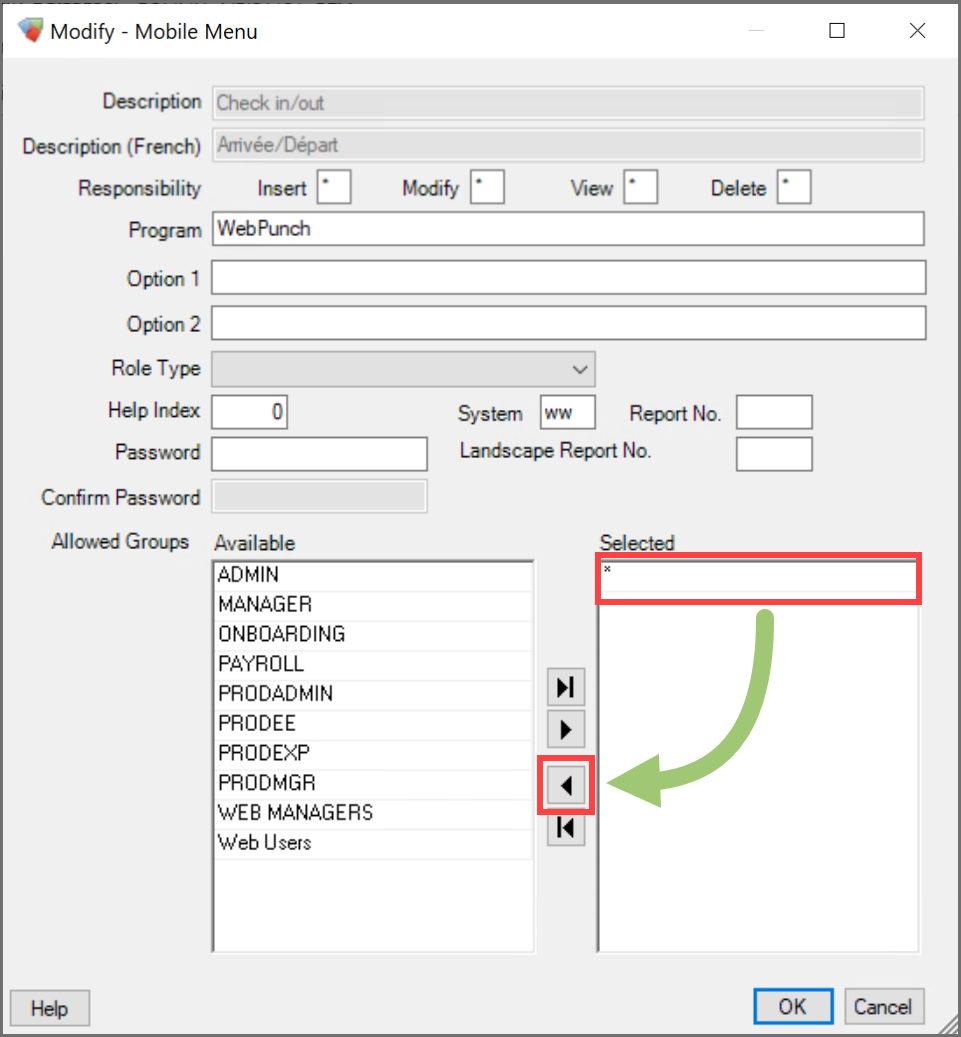
Step 7: Select * from the Selected column and click the arrow to move it to the Available column.
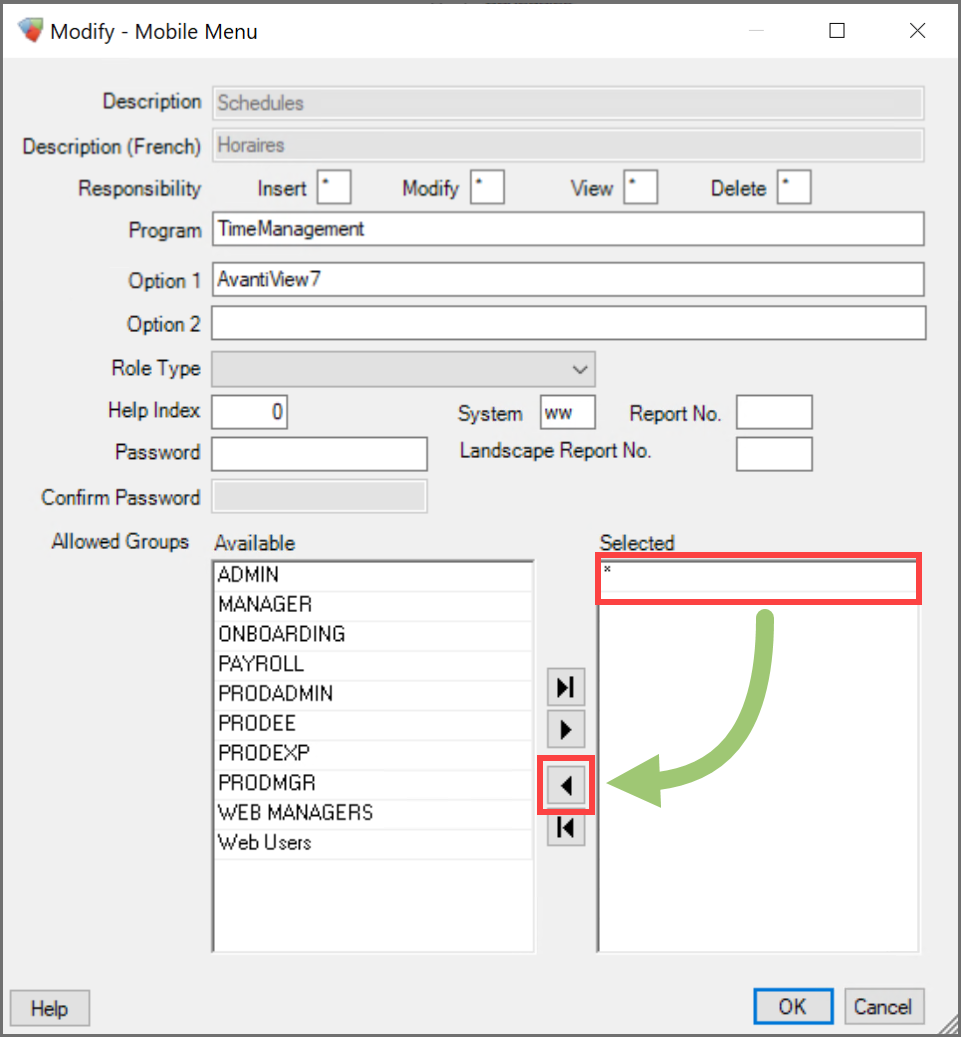
Step 8: Select a User Group that should have access on the Available column and click the arrow to move it to the Selected Column.

Step 9: Repeat Step 8 until all the User Groups that should have access are in the Selected section
Step 10: Select OK to save your changes, then select OK once more.

Congratulations! You’ve finished setting up Schedules on Avanti Go.
Set Up Check In/Out on Avanti Go
Employees can check in when they start work and check out when they leave work using Check in/out. If you would also like them to be able to check in and out for breaks, they can use Check in/out (with breaks).
Both Check in/out and Check in/out (with breaks) can include or require the device’s location when employees check in or out, as well as when they go on break and return to work.
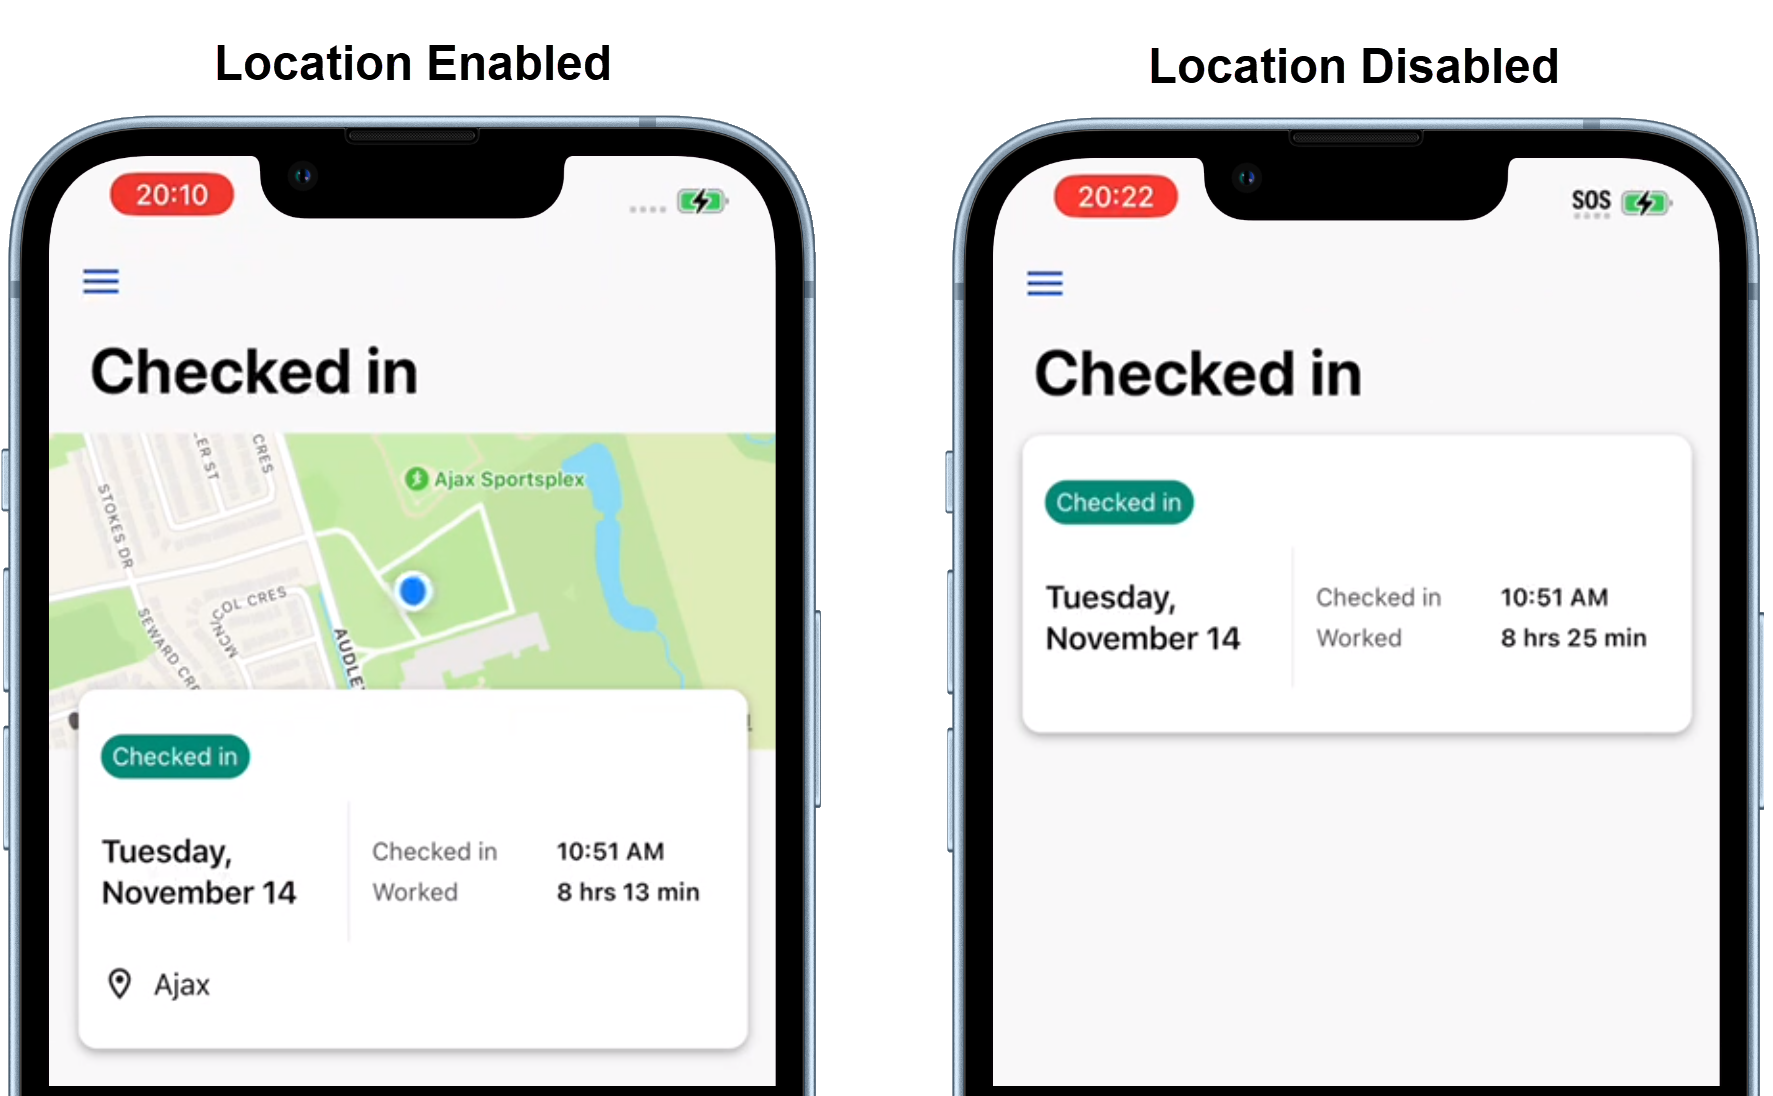
If location is enabled, employees can use region monitoring to notify them if they missed checking in/out when they enter or leave the location of their last check in.
The following guides you through setting up check in/out on Avanti Go:
How to Use Location when Employees Check In/Out
Here, you’ll find everything you need to know about using the device’s location when an employee checks in/out. You can either:
Capture your employees’ location when they check in/out if they’ve granted location permissions on the device.
orRequire your employees’ location; they won’t be able to check in/out to work or for breaks until they grant location permissions on the device.
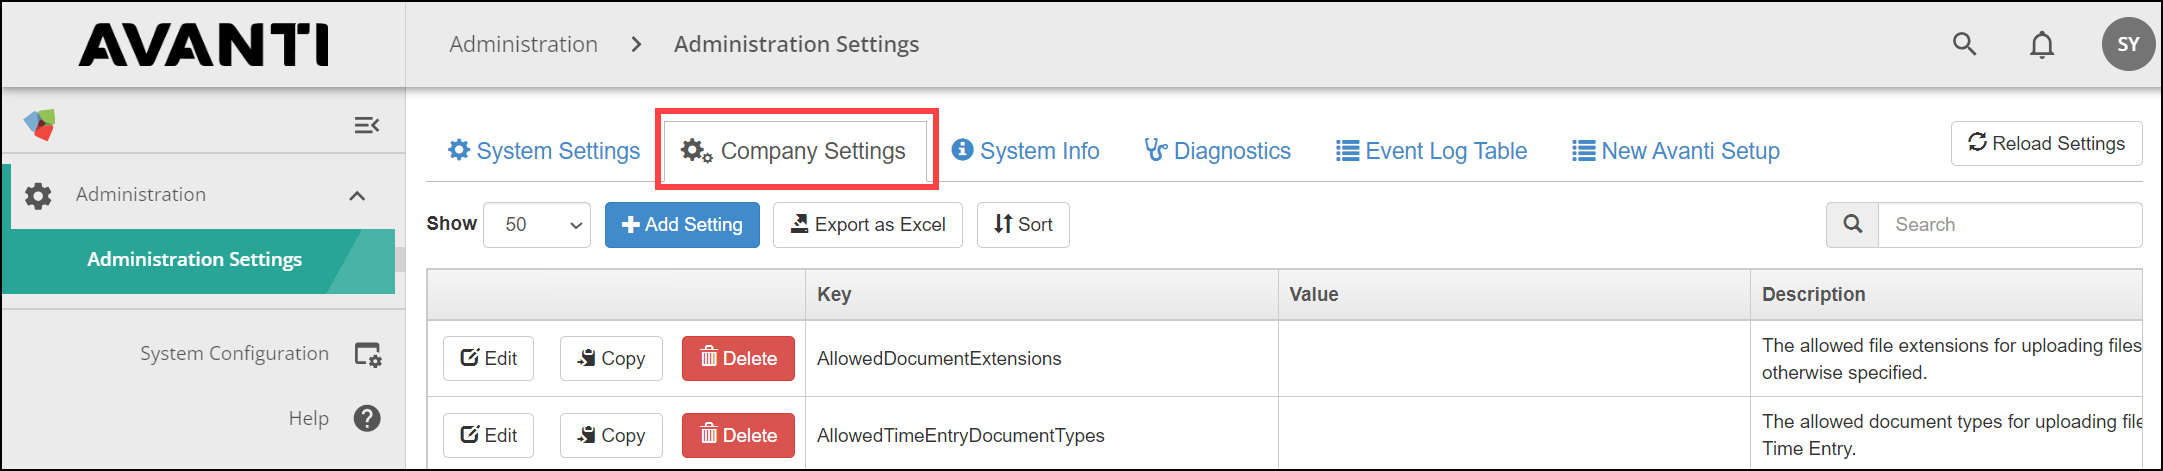
Step 1: Select the Company Settings tab in Administration Settings on the Avanti Self-Service Portal.
By default, this can be found in Administration.
Step 2: Enter MobileSettings.WebPunchSettings.EnableLocationServices into search. Ensure there are no trailing spaces.

Step 3: Select Edit.

Step 4: Select the checkbox beside Value, then click Save.

Congratulations! When employees allow Avanti Go to access the device location, the longitude and latitude coordinates of their location will log when checking in/out. Additionally, they can use Region Monitoring.
If you would like to require access to the employees’ location to check in/out, please skip to the Require Location When Employees Check In/Out section.
Additional Information
If you are satisfied with this setup, select Reload Settings.

Congrats! You’ve made the location optional for your employees. You can skip to Add Check In/Out to the Mobile Menu section to finish setting up check in/out on Avanti Go.
How to Require Location When Employees Check In/Out
If you would like to require location services for employees to check in and out, please complete the following:
Step 1: On the Company Settings tab on the Avanti Self-Service Portal, enter MobileSettings.WebPunchSettings.RequireLocationServices into search. Ensure there are no trailing spaces.
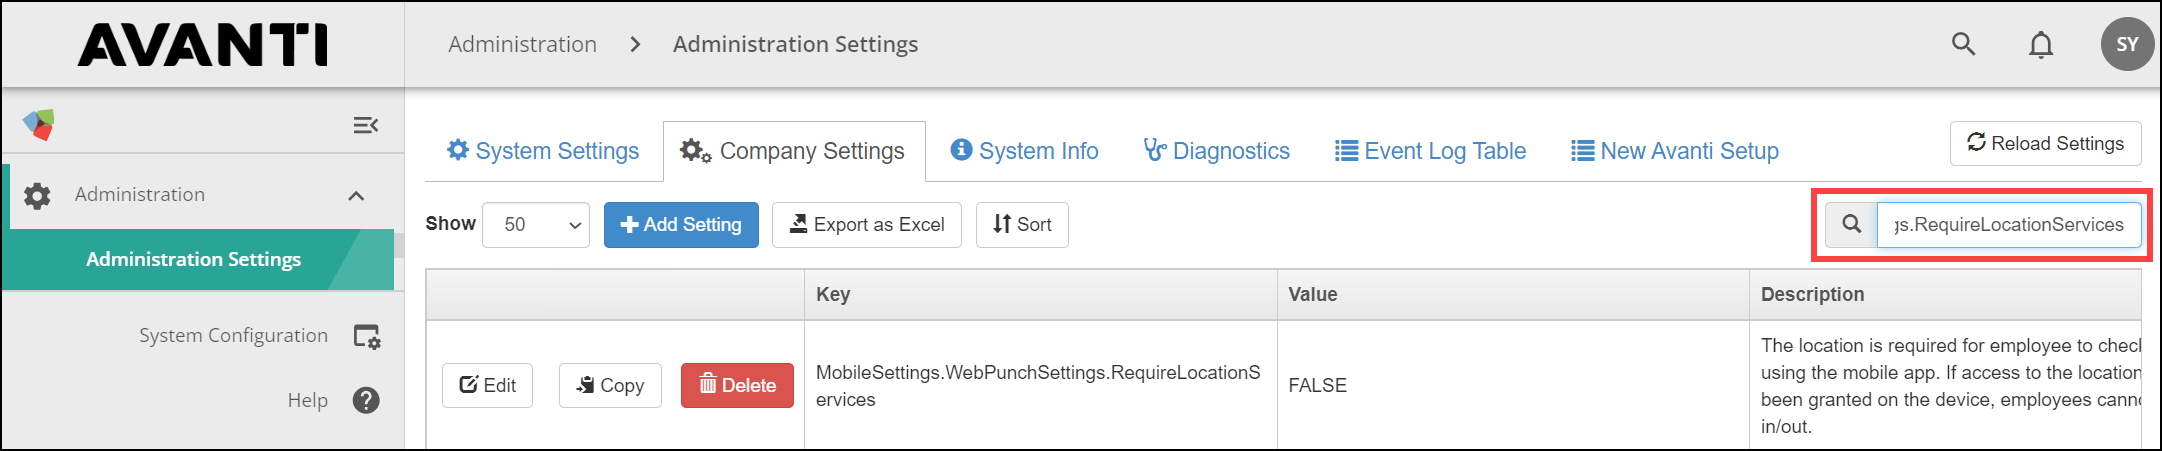
Step 2: Select Edit.

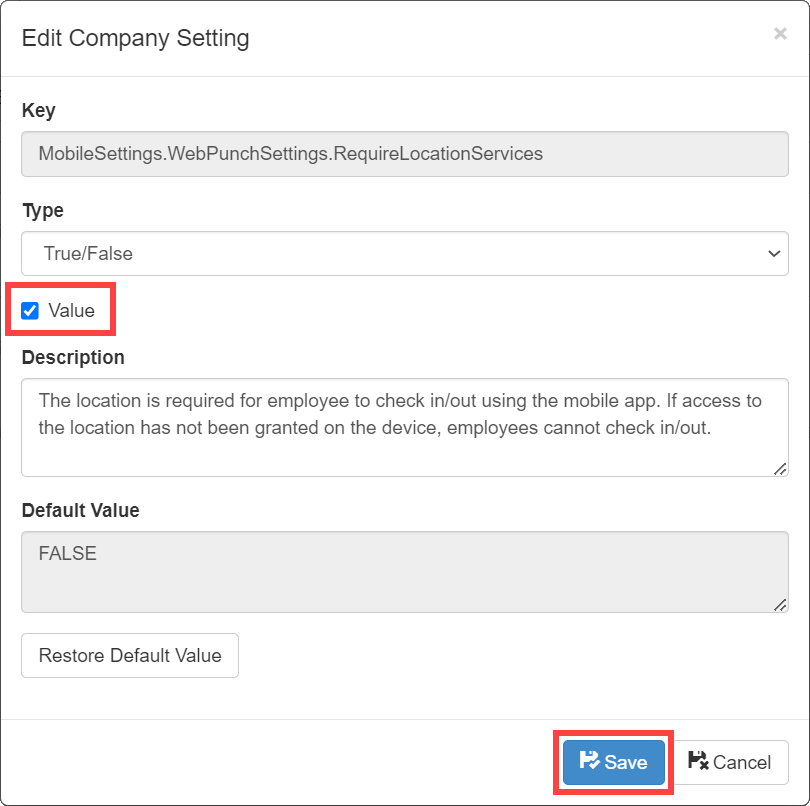
Step 3: Select the checkbox beside Value, then click Save.
Step 4: Select Reload Settings.

Congratulations! The employee must allow access to their location before they can check in/out on Avanti Go.
How to Check In/Out to the Mobile Menu
Now, you go through the final step of adding Check in/out or Check in/out (with breaks) to the Mobile Menu.
Step 1: Determine whether you want to add Check in/out or Check in/out (with breaks) to the menu.
With Check in/out, employees can Check In and Check Out.
With Check in/out (with beaks), employees can Check Out from Break and Check In from Break along with Checking In and Check Out.

Step 2: Select Display Update Menu in the Mobile Menu on the Avanti Desktop.
By default, this can be found in Web Services >> Installation & Maintenance.

Additional Information
Once Display Update Menu is selected, an additional column, Update Menu, will display. The Update Menu displays all the available menu items.
Step 3: Check in/out and Check in/out (with breaks) will be displayed in red on the Update Menu. Right-click on the item you want to add and select Add New in Avanti Menu.

Step 4: If all your employees should check in/out on Avanti Go, skip to Step 9; otherwise, select Hide Update Menu.

Step 5: Right-click on your created menu and select Modify if some employees don’t check in/out.
Additional Information
These descriptions on Avanti Go cannot be changed.
Step 6: Select * from the Selected column and click the arrow to move it to the Available column.
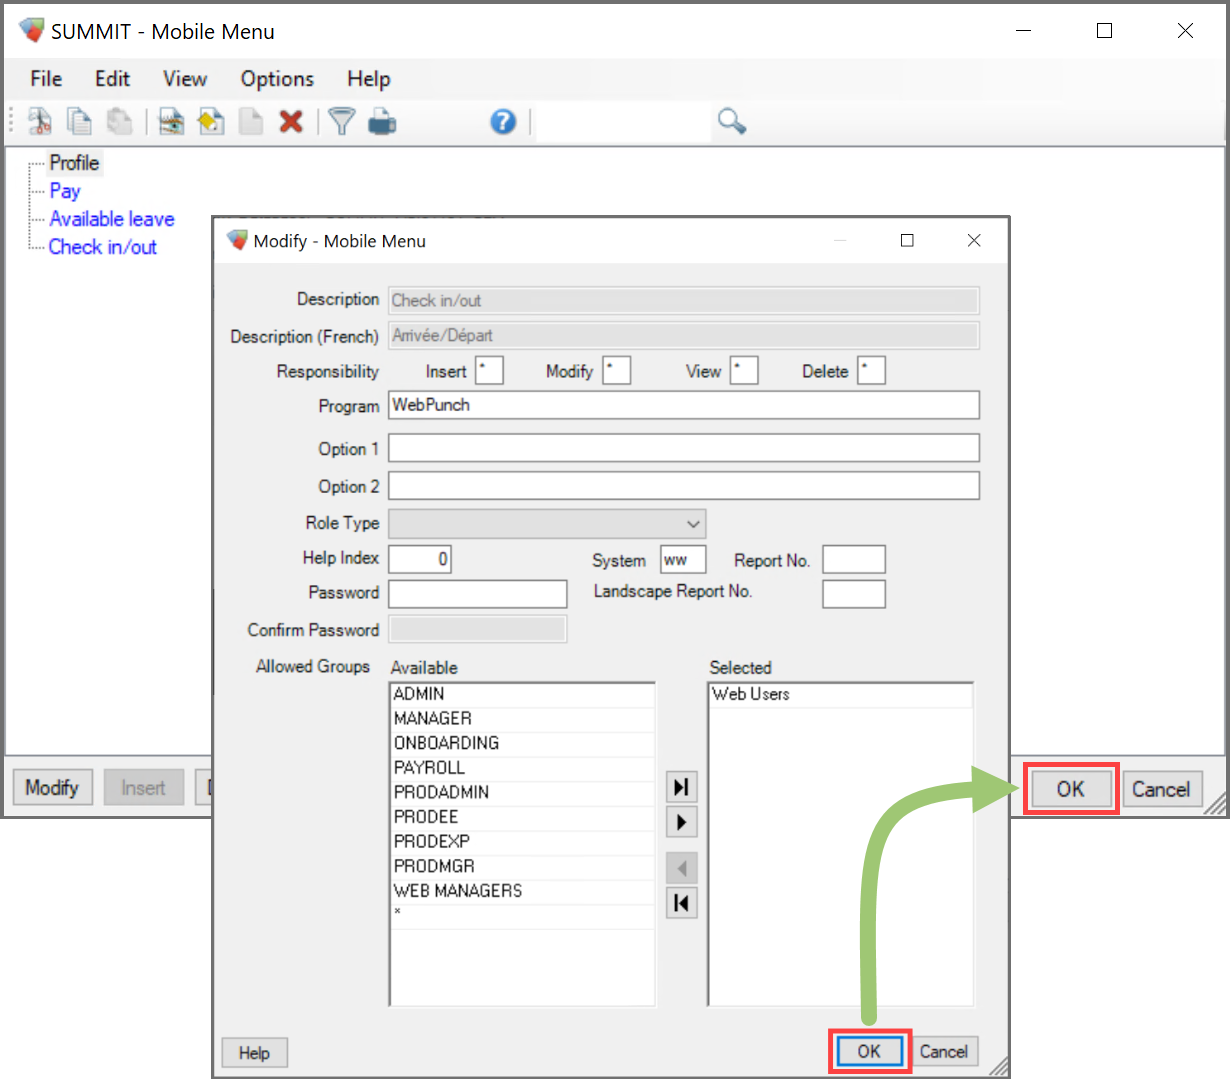
Step 7: Select a User Group that should have access on the Available column and click the arrow to move it to the Selected Column.

Step 8: Repeat Step 7 until all the User Groups that should have access are in the Selected section.
Step 9: Once you have finished making changes to the mobile menu, select OK, then select OK to save your changes.
You’re all done! Employees can now check in/out using Avanti Go.
Want to add even more features to Avanti Go? You can set up:
Notifications to keep employees up-to-date.
Tax Slips on ASSP & Avanti Go so employees can access their tax info on the go.
Employee & Company Documents for employees to view their vital documents.
Available leave to take your employees’ guesswork out of time off by showing them their allotted time off.
Check in and out for employees to track their workday anywhere they have an internet connection.
Schedules so employees Avanti Go to know when they’re working next.