Put Avanti in your employees’ pockets by setting up the Avanti Go mobile app. Here, you’ll learn how to set up the following on Avanti Go:
You
Pay
There are some additional steps needed to use notifications and schedules; you can set this up once you finish:
Adding the setup to the System Menu
Add the Mobile Menu to the System Menu so you can determine which features of Avanti Go to use.
Configure Avanti Go
Update the settings specific to the Avanti Go.
Setting up the Mobile Menu
Determine which features to include on the app and who can access them.
Additional Information
The Avanti Self-Service Portal is required to use Avanti #AvantiGoSetupGuide-#AvantiGoSetupGuide-HowtoAddtheAvantiGoMeGo. Reach out to your Account Manager if you aren’t using our web portal yet.
Employees can choose to be automatically logged out anytime Avanti Go is closed or remains in the background for over a minute; everyone needs to re-enter their credentials every 60 days to use Avanti Go.
How to Add the Avanti Go Menus to the System Menu
The following steps will guide you through adding the Mobile Menu to the System Menu.
Step 1: Select Display Update Menu in the System Menu.
By default, this can be found in System Administration >> System Menu.
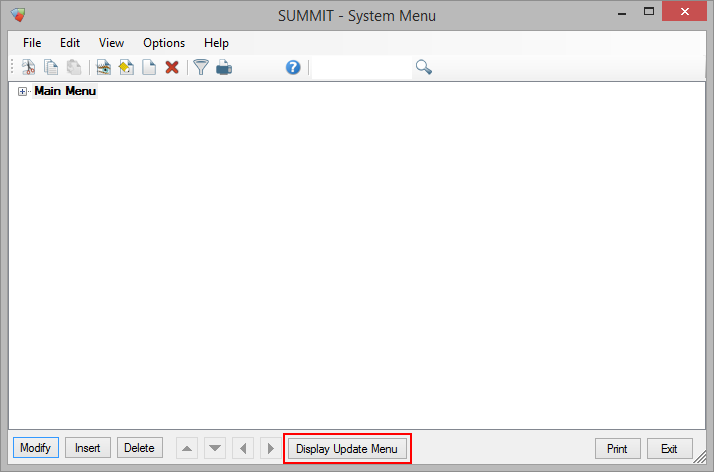
Once Display Update Menu is selected, an additional column, Update Menu, displays. The Update Menu displays all the available menu items.

Step 2: Under Web Services, the Mobile Menu may be red. If so, right-click on the item and select Add New in Avanti Menu.
Additional Information
If the Mobile Menu is not red, it’s already on your menu. You can select Exit and skip to Setup Avanti Go.

Step 3: Select OK to save your changes.

How to Setup Avanti Go
Avanti Go combines settings that impact ASSP with those that only affect Avanti Go. The following guides you through the new settings, which only impact Avanti Go:
Setting up You
In You on Avanti Go, you can decide whether:
Employees can update their names on Avanti Go.
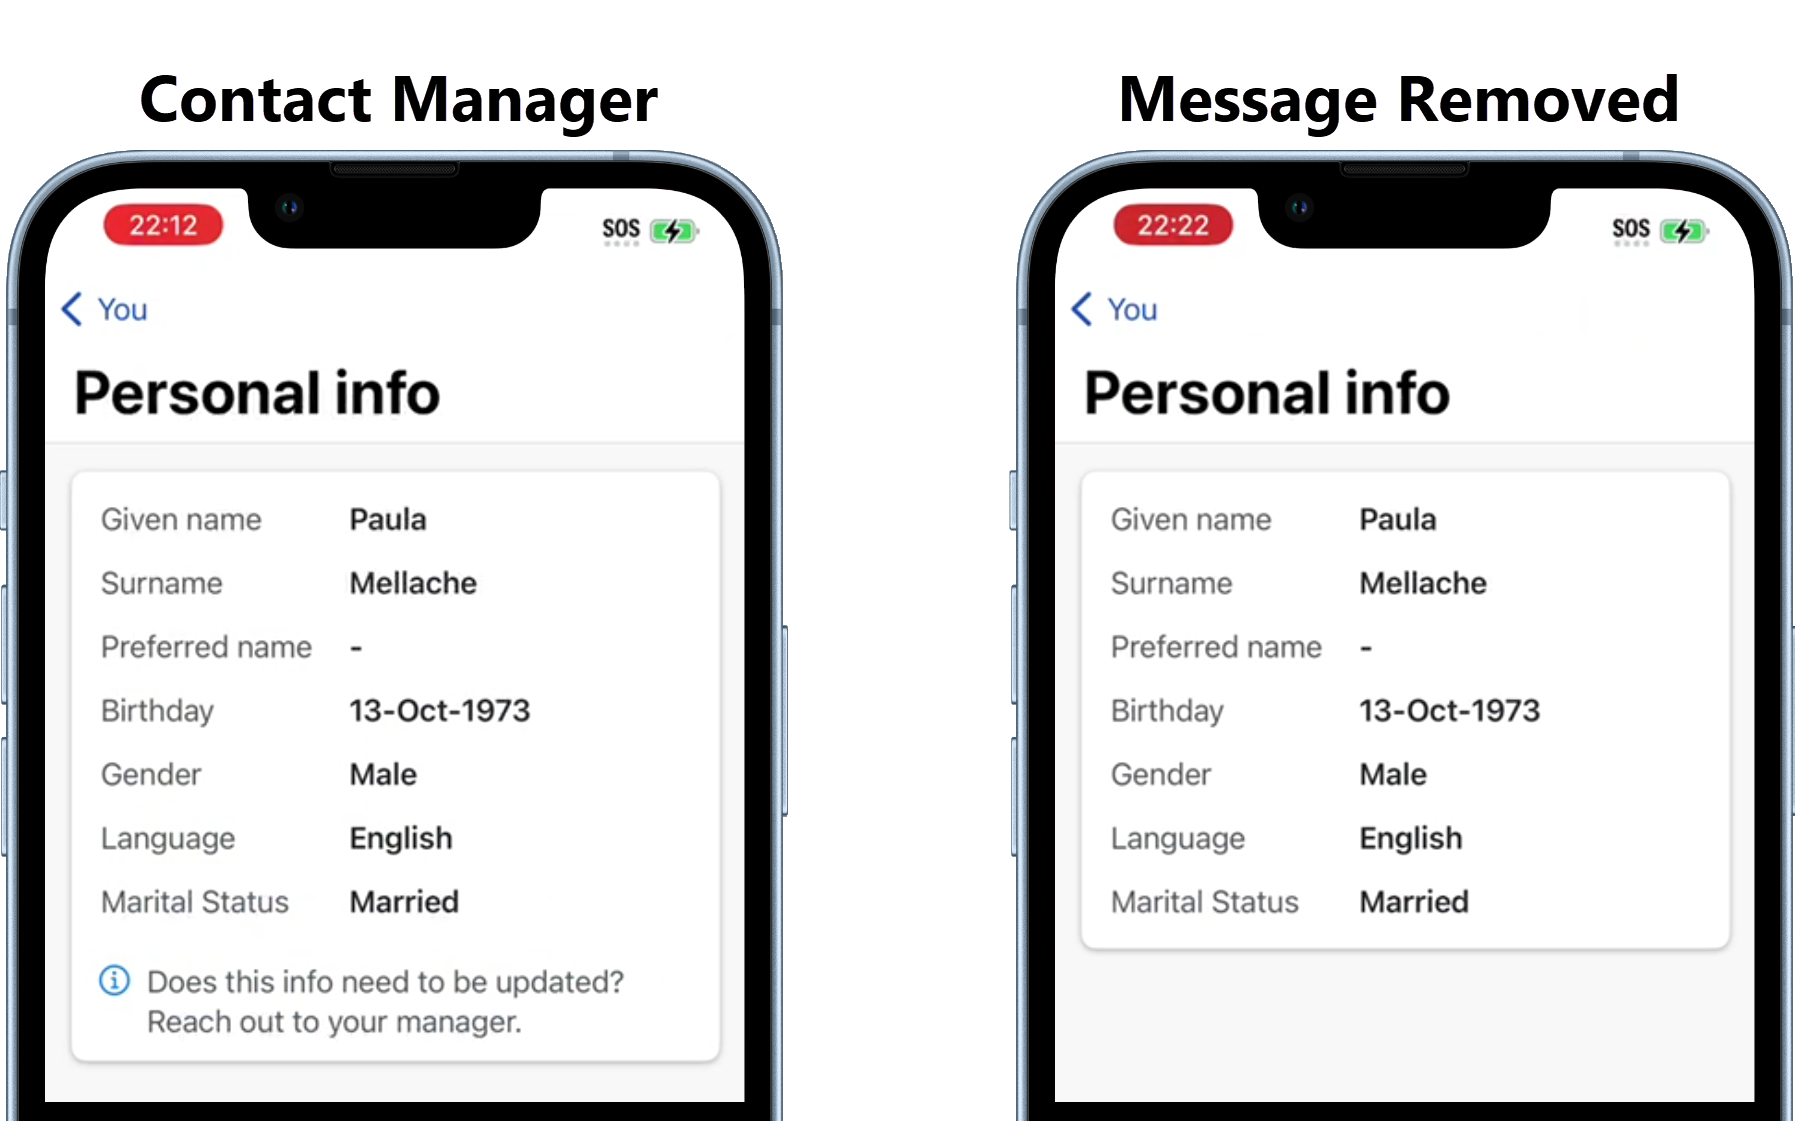
Employees will see a message to contact their manager if they need to change information they cannot update.
By default, employees cannot update their names and will see a message about how to update their information. If you are satisfied with this setup, skip to the Set Up Pay section.
Remove the Contact Manager Message
Additional Information
Employees can only update their names if you allow them to edit other fields in the You section.
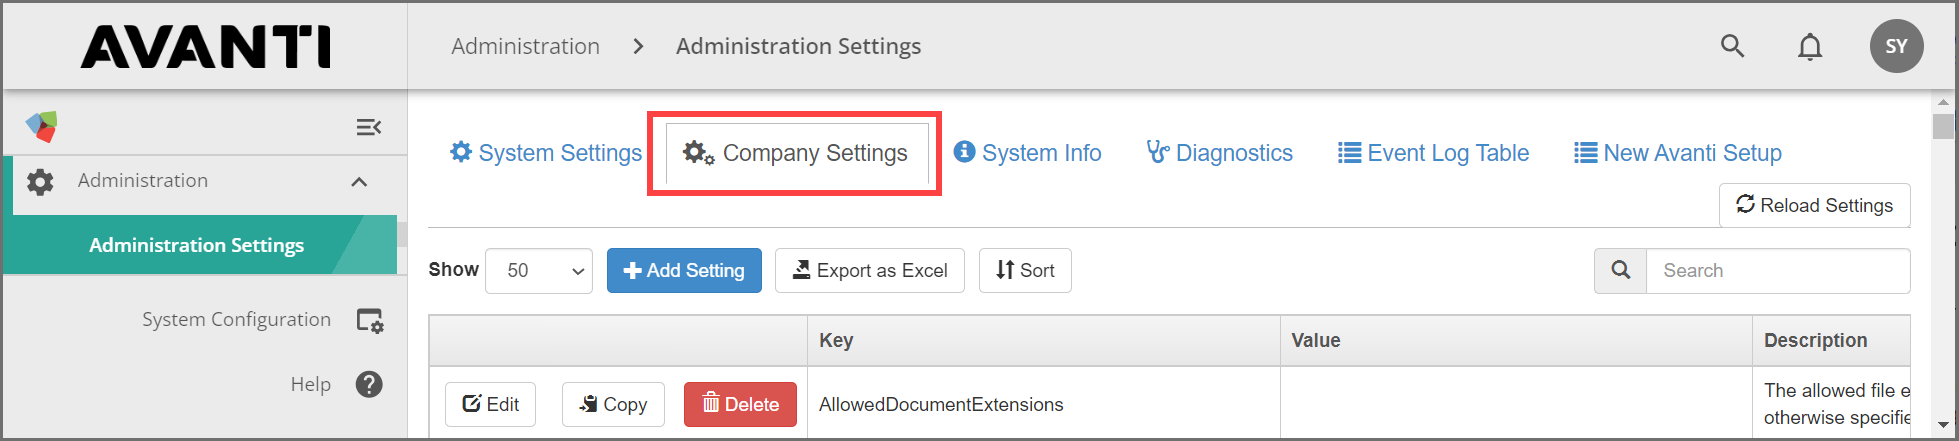
Step 1: Select the Company Settings in Administration Settings on the Avanti Self-Service Portal.
By default, this can be found in Administration.

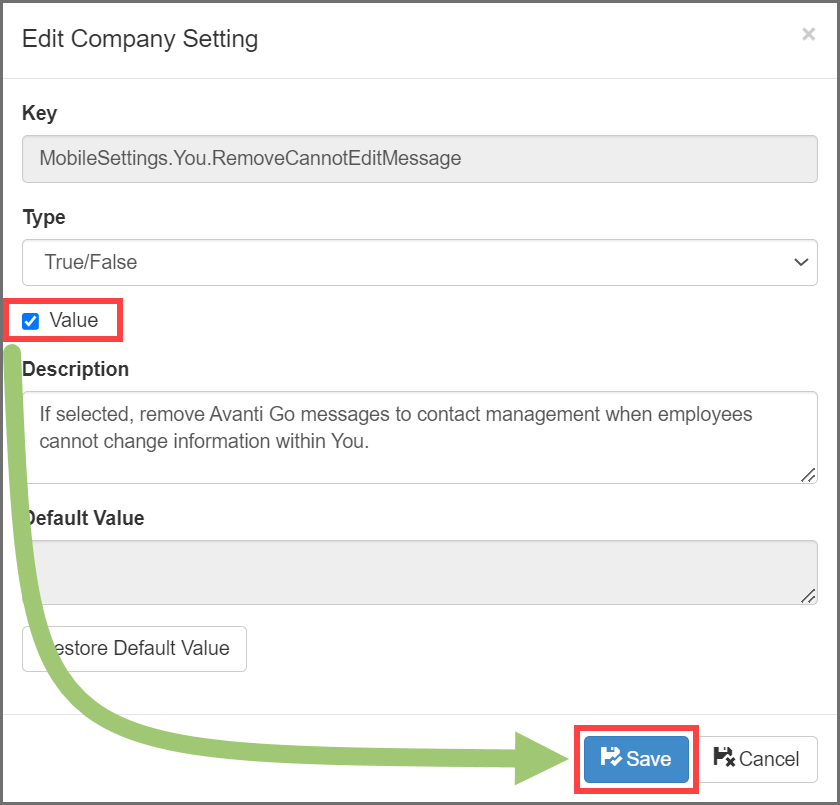
Step 2: Enter MobileSettings.You.RemoveCannotEditMessage into the search. Ensure there are no trailing spaces.

Step 3: Select Edit.

Step 4: Adjust the Value if necessary, then select Save.
If the Value is selected, employees cannot see the message.
If the Value is deselected, employees can see the message.
Step 5: Select Reload Settings.

Congratulations! You have completed the setup for You on Avanti Go.
Allow Employees to Update their Name
Additional Information
Employees can only update their names if you allow them to edit other fields in the You section.
Step 1: Select the Company Settings in Administration Settings on the Avanti Self-Service Portal.
By default, this can be found in Administration.

Step 2: Enter MobileSettings.EmployeesCanChangeName into the search. Ensure there are no trailing spaces.
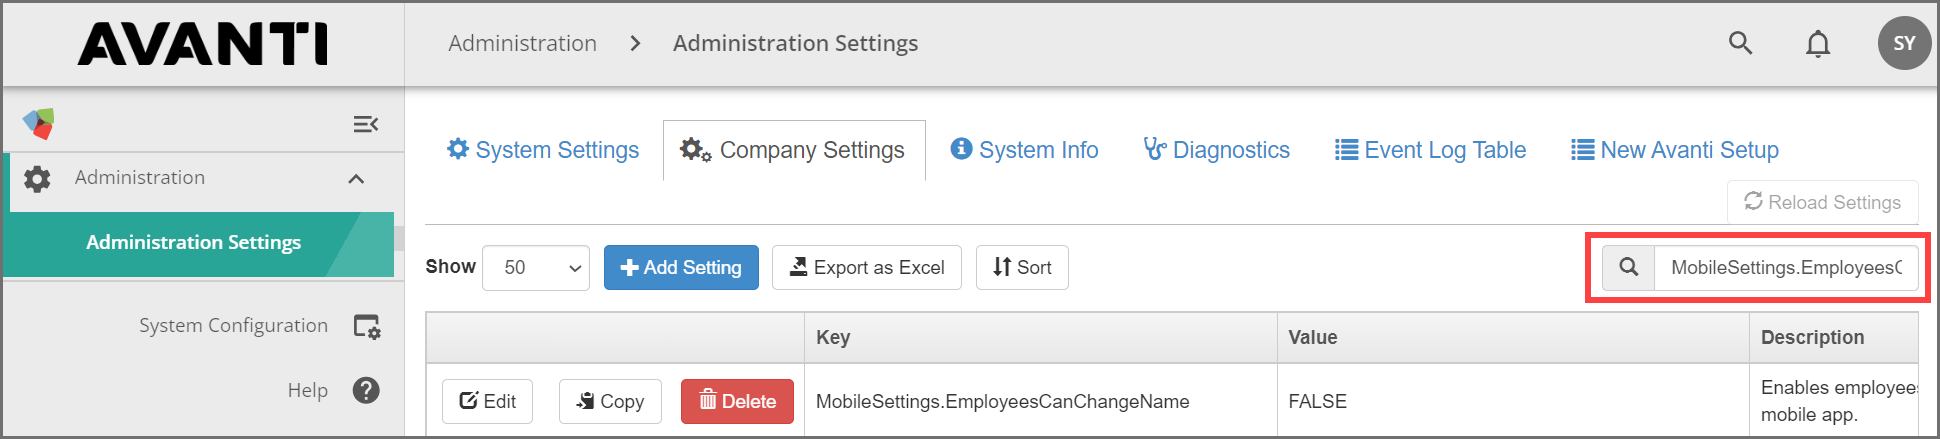
Step 3: Select Edit.

Step 4: Adjust the Value if necessary, then select Save.
If the Value is selected, employees can change their name.
If the Value is deselected, employees cannot change their name.

Step 5: Select Reload Settings.

Congratulations! You have completed the setup for You on Avanti Go.
Setting Up Pay
On Pay, you can:
Adjust how pays display
Mask the direct deposit account
By default, Pay will display both the details and formatted PDF files. When employees view the details, all characters of the direct deposit account will be masked except for the last four characters. If you are satisfied with this setup, skip to the Setting Up the Mobile Menu section.
Pay Display
Select how pays display on Avanti Go. Users can view pay as Details, PDFs, or both.
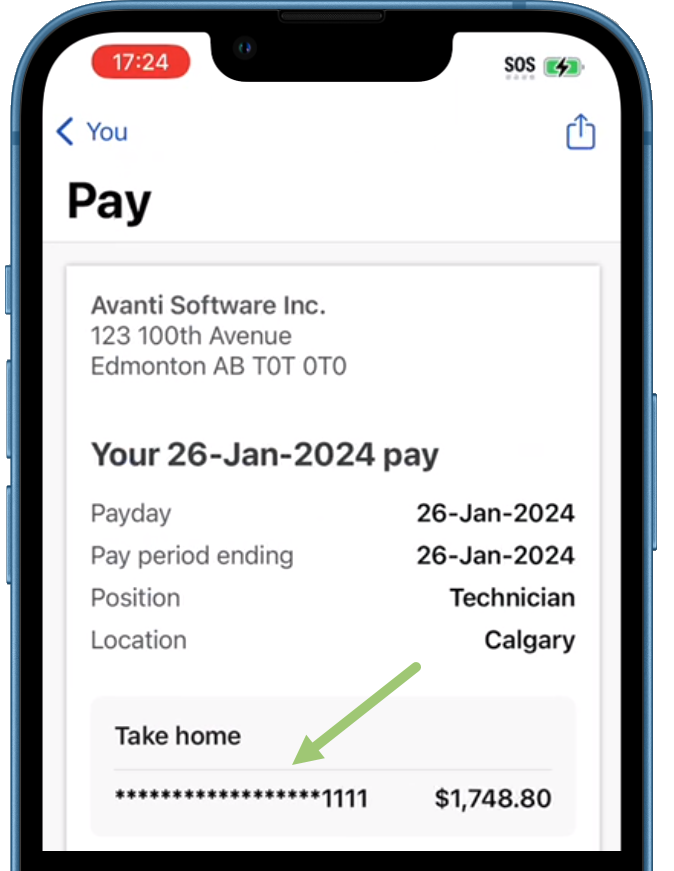
Details View: Displays key pay information, such as take home pay, cash compensation, and benefits.
PDF View: Displays the employee’s pay based on your pay statement setup.
Both: The Details display first; employees can access the PDF view in the top-right corner of Details.

By default, Pay displays both Details and PDF. If you are satisfied with this setup, skip to the Mask the Direct Deposit Account section.
If you would like to change to display only Details or only PDF, complete the following:
Step 1: Select the Company Settings in Administration Settings on the Avanti Self-Service Portal.
By default, this can be found in Administration.

Step 2: Enter MobileSettings.PayStatementView into the search. Ensure there are no trailing spaces.

Step 3: Select Edit.
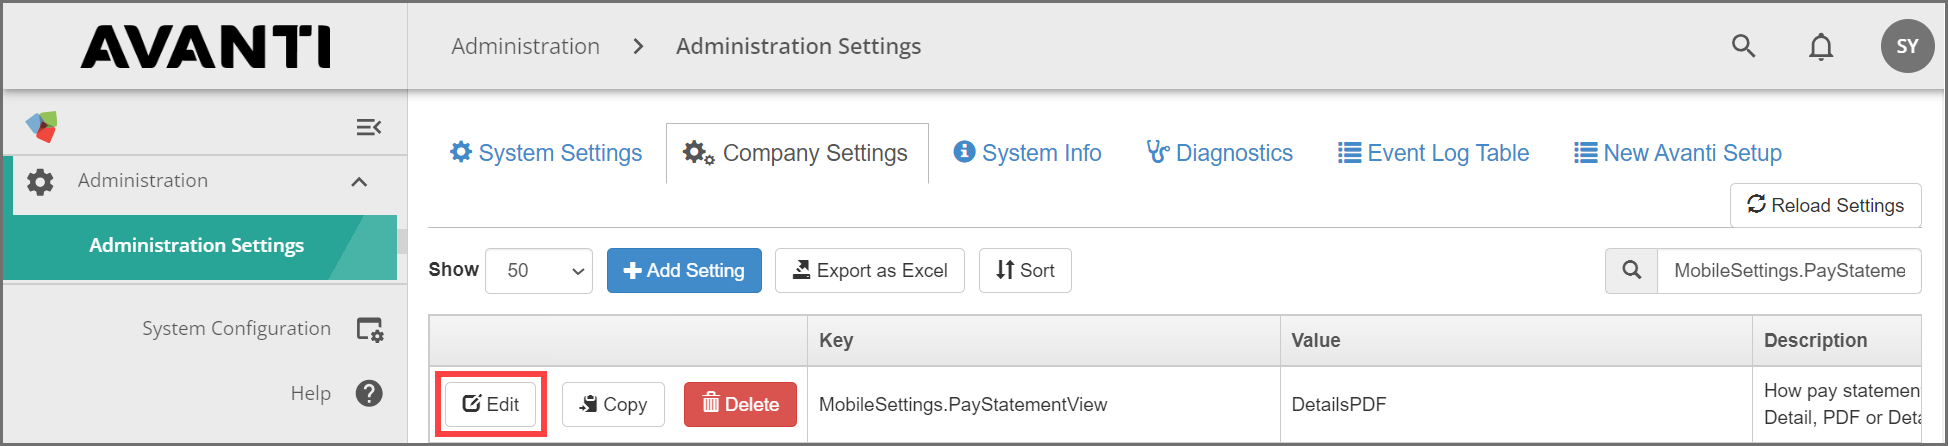
Step 4: Update the Value and select Save:
Update the Value to DetailsPDF to display both the Details and PDF.
Update the Value to Detail so just the Details display.
Update the Value to PDF to display just the PDF.

Step 5: Select Reload Settings.

Mask the Direct Deposit Account
Determine how the direct deposit account will mask on the Details display for Pay.
When employees view the details, all characters of the direct deposit account will be masked except for the last four characters by default. If you are satisfied with this or are not displaying Details, skip to the Setting Up the Mobile Menu section.
If you would like to change the mask on the direct account, complete the following:
Step 1: Select the Company Settings in Administration Settings on the Avanti Self-Service Portal.
By default, this can be found in Administration.
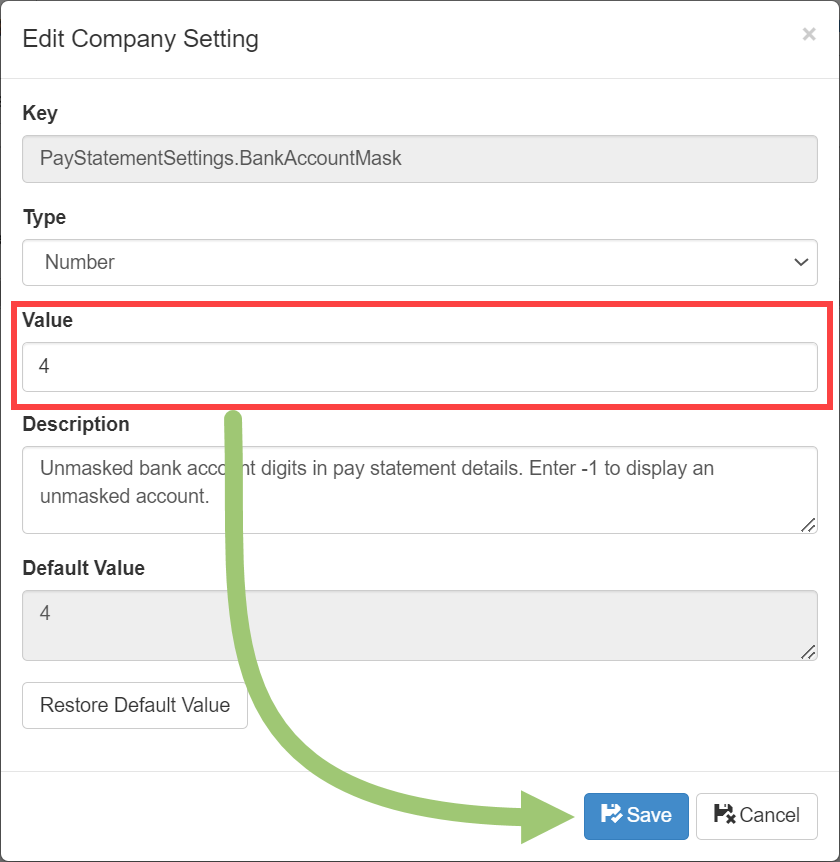
Step 2: Enter PayStatementSettings.BankAccountMask into the Search. Ensure there are no trailing spaces.

Step 3: Select Edit.

Step 4: Update the Value to the number of digits that should display. The remaining characters will be masked with a *. If you would like all the characters to be displayed, enter -1. Then select Save.
Additional Information
If the employee’s direct deposit account has a space, this will count as a displayed account digit.
Step 5: Select Reload Settings.

Congratulations! You have completed the setup for Pay on Avanti Go.
Setting Up the Mobile Menu
By default, the following menus will be available to add to the Mobile Menu.
Profile, which appears in Avanti Go as You
Pay
Check in/out
Check in/out (with breaks)
Schedules
Available leave
The following will guide you through adding the menu items you want to feature.
Step 1: Determine which menu items should be displayed.
Important Information
There’s some menus you shouldn’t add if you’re not planning to set them up immediately:
Don’t add Available leave if you haven’t set it up yet. Check out Available Leave on Avanti Go Setup to learn more.
Don’t add Check in/out, Check in/out (with breaks), and Schedules if you do not have Time & Attendance or are not planning to set these up immediately. Go to Schedule and Check In/Out Setup on Avanti Go for more information on setting up Time & Attendance.
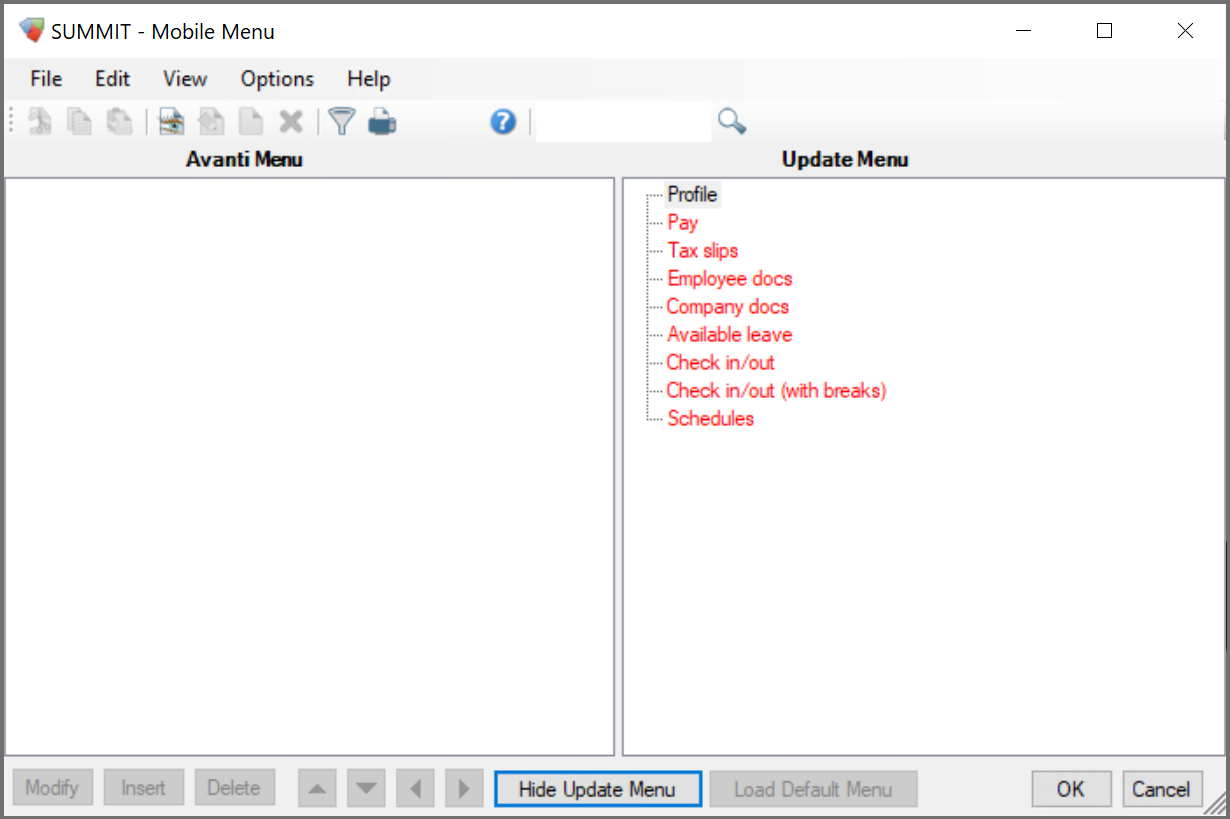
Step 2: Select Display Update Menu in the Mobile Menu on the Avanti Desktop.
By default, this can be found in System Administration >> System Menu.

Once you select Display Update Menu, an additional column, Update Menu, will display. The Update Menu displays all the available menu items.
Step 3: Select the item you want to add, right-click and select Add New in Avanti Menu.
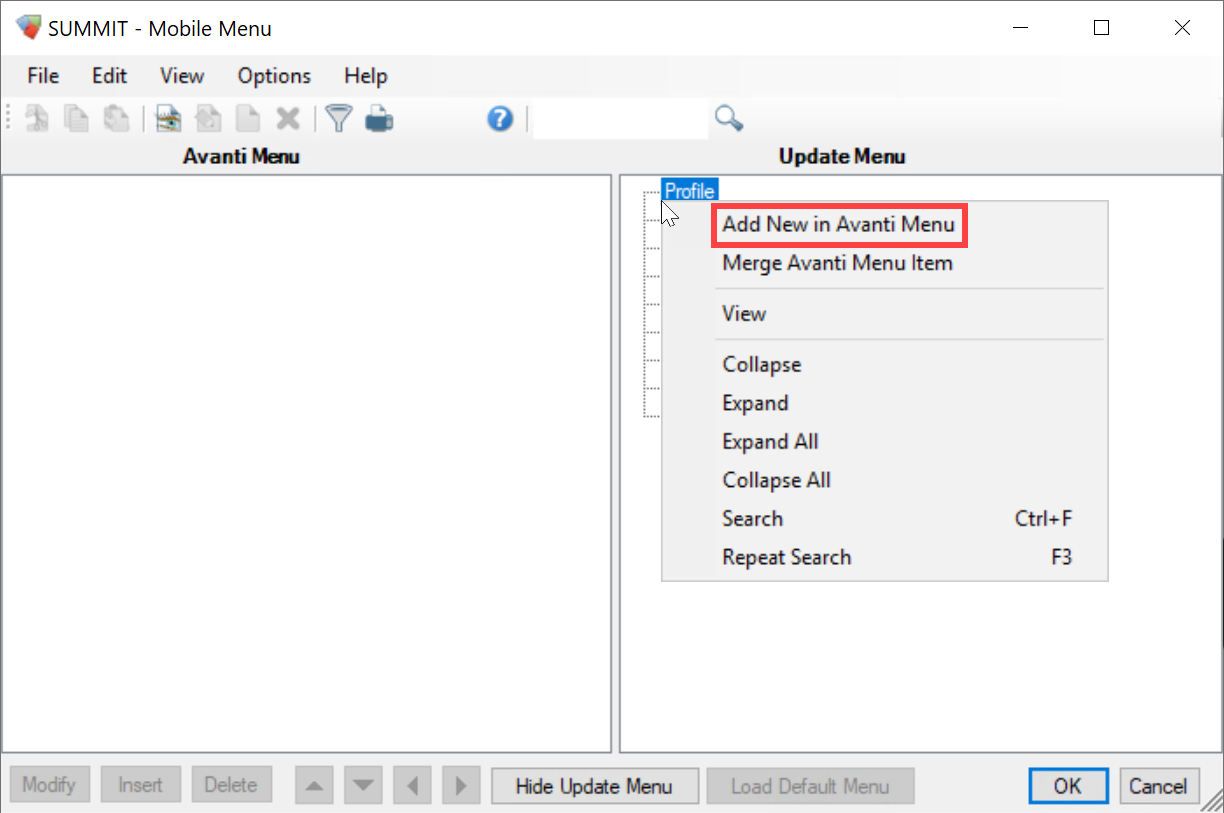
Step 4: Repeat Step 3 for each menu item you want to add.
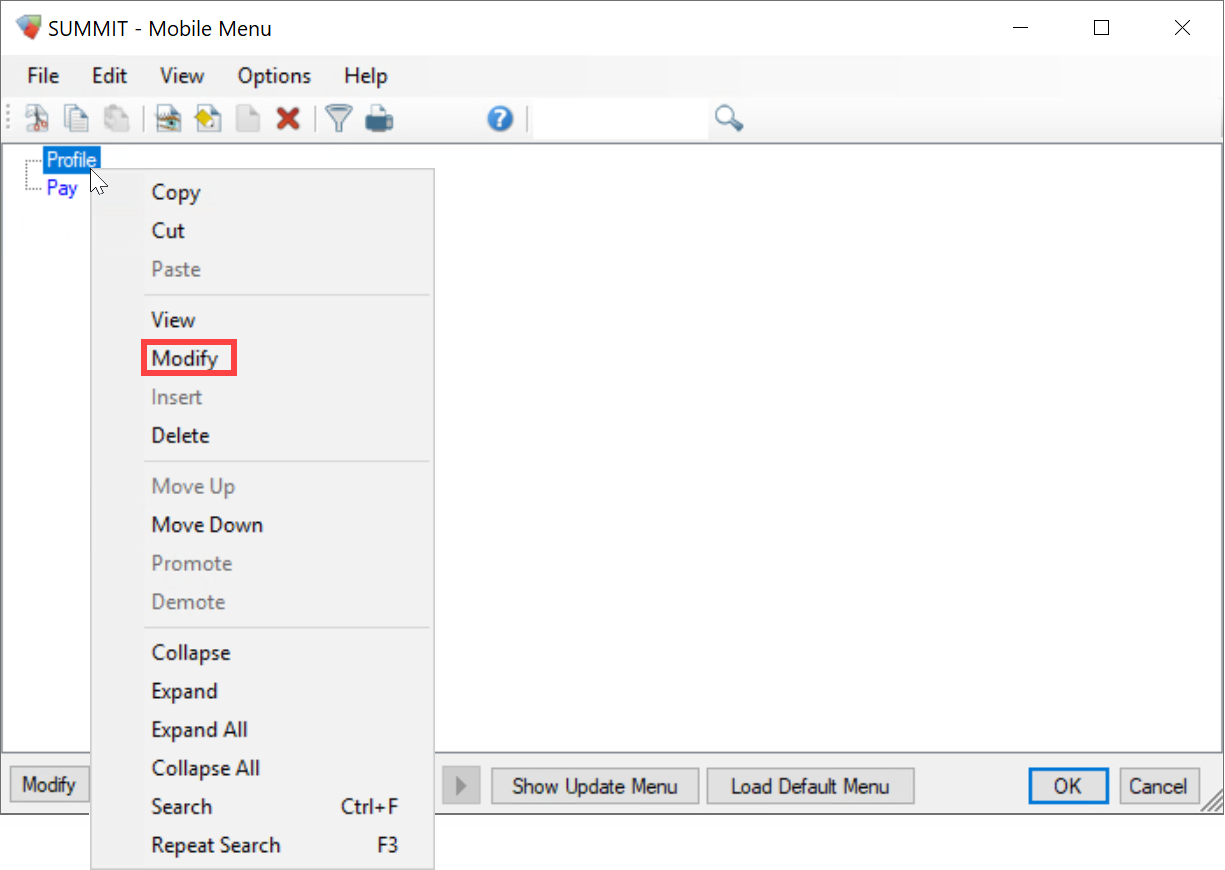
Step 5: If you want everyone to access these features, skip to Step 12; otherwise, select Hide Update Menu.

Step 6: Right-click on the feature you’d like to adjust access for and select Modify.
Additional Information
These descriptions on Avanti Go cannot be changed.
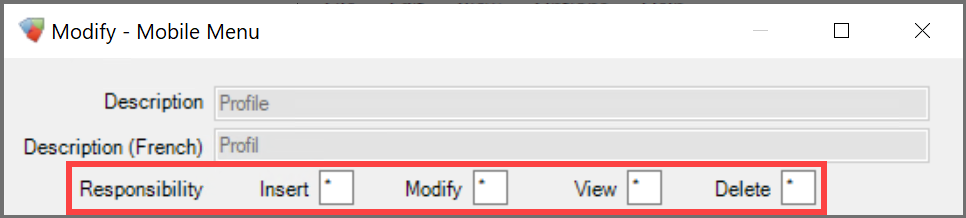
Step 7: Set your desired Responsibility to Insert, Modify, View, and Delete information.
Additional Information
Pay only uses View Responsibilty.
A * grants access to all users.
Enter an A to restrict access the most. Only users with A will have access.
Enter any other letter. Users with that letter will have access. Users with a letter between that level of access and A will also have access.
Additional Information
Responsibility levels range from A to Z, with A being the most restrictive. The user’s responsibility level is based on their assigned user groups. Go to Responsibilities for more details.
For example, if the Insert Responsibility is B, the user must have A or B access to add their Personal Information.
Step 8: Select * from the Selected column and click the arrow to move it to the Available column.
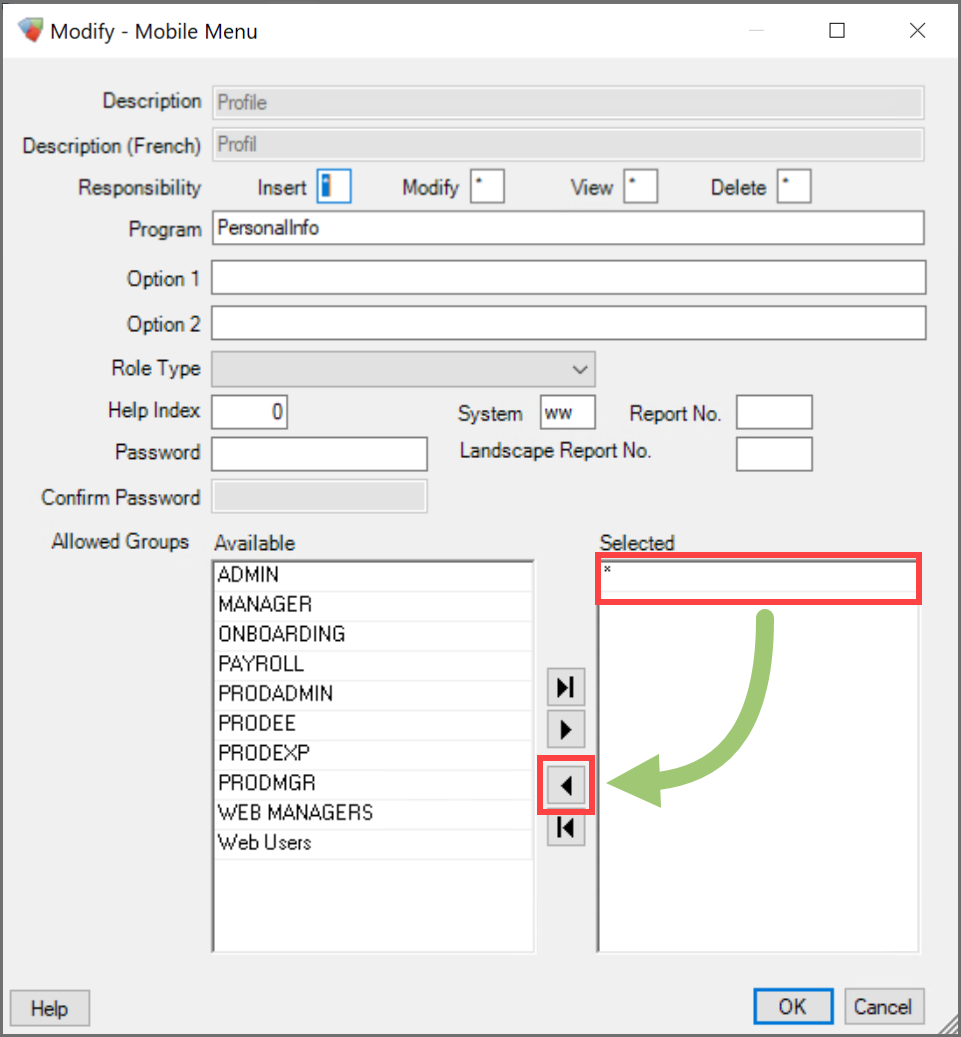
Step 9: Select a User Group that should have access on the Available column and click the arrow to move it to the Selected Column.
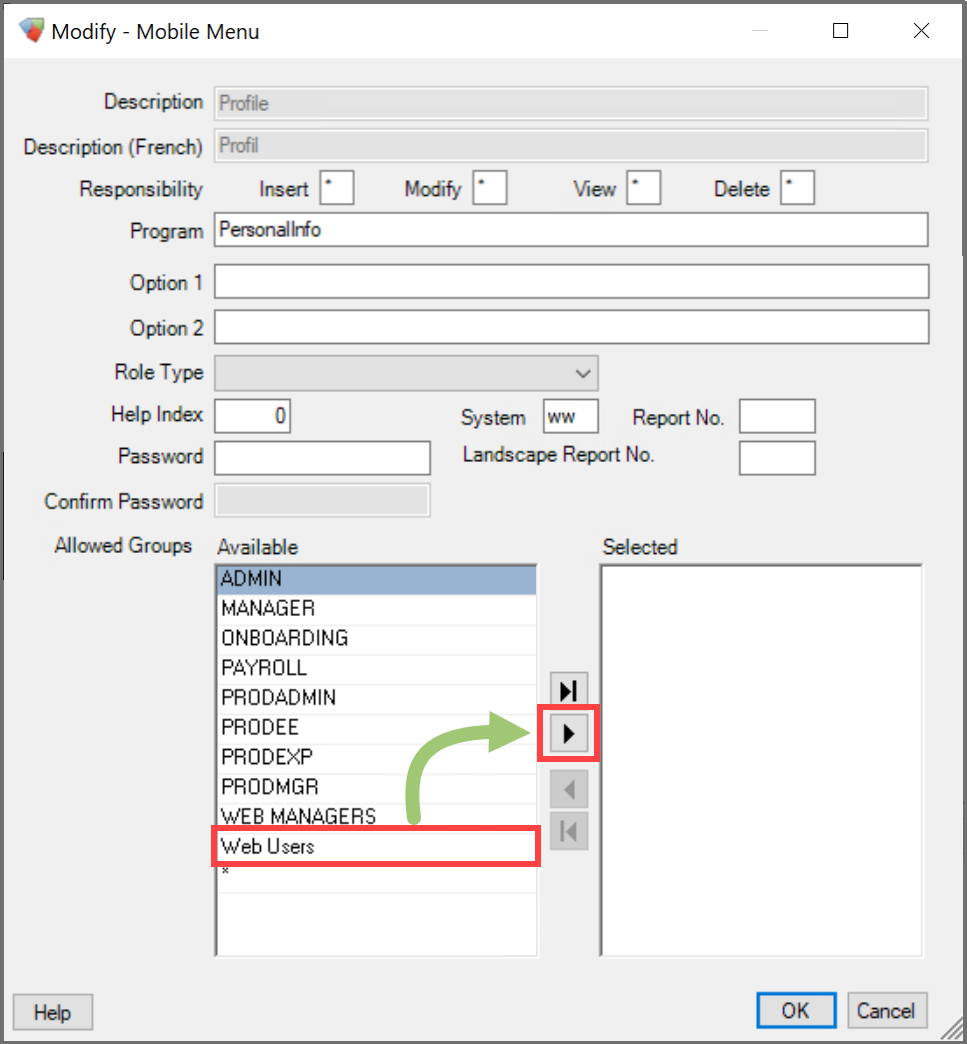
Step 10: Repeat Step 9 until all the User Groups that should have access are in the Selected section. Then click OK to save your changes.

Step 11: Repeat Steps 6 to 10 for each feature you’ve added.
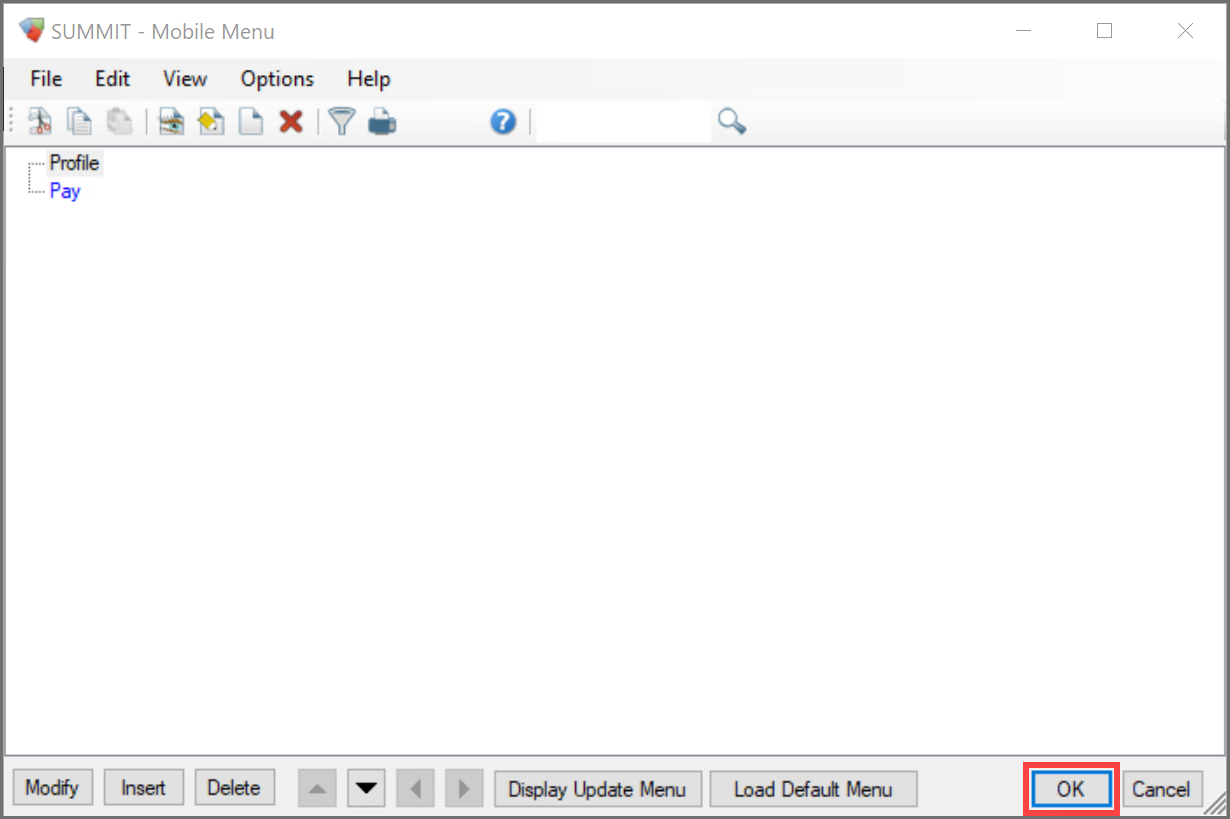
Step 12: Once you have finished making changes to the mobile menu, select OK to save your changes.
Congratulations! You’re finished set up and you’re ready to download Avanti Go.
Want to add even more features to Avanti Go? You can set up:
Notifications to keep employees up-to-date.
Tax Slips on ASSP & Avanti Go so employees can access their tax info on the go.
Employee & Company Docs for employees to view their vital documents.
Available leave to take your employees’ guesswork out of time off by showing them their allotted time off.
Check in and out for employees to track their workday anywhere they have an internet connection.
Schedules so employees can check Avanti Go to know when they’re working next.